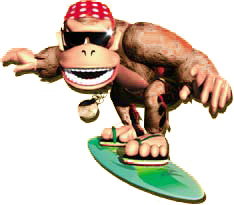
Saturday, March 10, 2012

Honey Queen

History:

For eons the Queen of all Bees has held dominion over the Bee Diaspora throughout the Universe. The Honey Queen is their unquestioned Lord, as she is the Mother of all Bees. She hails from the Honeyhive Galaxy, a close neighbor to the Mushroom Galaxy. She has been a longtime ally to Rosalina and the Lumas and more recently encountered Mario on his Interstellar Journeys. As the thrill of the Grand Prix has been exposed on a more Universal scale, the Honey Queen became intrigued. She was able to join in the 2011 Tournament and even put up a planet in her galaxy for a Battle Arena.

7:

The Honey Queen is an interesting addition to Mario Kart 7. Likely it was part of a goal to well-represent Female Characters better, which is commendable. She is a Heavy character, making her the largest Female in the series to date, dwarfing Rosalina who is of the Cruiser Class now. Each Class in 7 has identical stats, meaning she possesses the same base as Bowser, Wario, and Metal Mario. The Heavyweights have exceptional weight and speed, but lack everything else in comparison to other classes. In addition to this, there are sixteen different Karts, most of which are associated in some way with a particular Driver. To add to this intense customization are ten different sets of Wheels and seven different Gliders, all of which affect stats, making any Racer fairly customizable to fit any playing style. For now we've taken the Queen's signature Kart, the Bumble V for a closer look:


The addition of Wood Tires and the Paraglider make the Queen ready for any circumstance. She has above average stats in just about everything here and excels most at handling, especially in Sea and Air, as well as Off-Road, Drift, and Mini-Turbo. She's therefore ready for the most difficult courses and can recover quickly in any situation. This lack of specialization makes this combination less useful in courses without Off-Road or plenty of straightaways, such as Neo Bowser City, but lets her take control on tracks like Cheep Cheep Cape, Piranha Plant Slide, and Bowser's Castle.

Every character has two Staff Ghosts on two Courses in Time Trial Mode. The Honey Queen appears on the Original Rainbow Road in the Royal Ribbon with Slim Wheels and Peach's Parasol in 02:10.090. She'll have the best of both worlds with speed and handling, tho her parasol will slow her down in the air, which Rainbow Road can have plenty of. She switches to her own Bumble V with Standard Wheels and the Flower Glider in 01:52.077. This combo will almost do the same thing, with a bit less oblique speed. She has that touch of intergalactic novelty and royalty that makes her a good fit here.

Her second Ghost is at the Retro Coconut Mall, which I guess is girly enough for the Big Bee. She does a 02:30.117 using the Standard and Slim Wheels again, but this time uses the Super Glider, which means she won't lose air speed. The Coconut Mall doesn't require the handling the Slim Wheels provide and you can beat her with some speed. The Expert goes 02:14.167 in the Koopa Clown, Sponge Wheels, and Paraglider, which is great around the sharp turns here but again loses Speed.

Wario's Gold Mine

History:

After years of searching for Gold, Coins, and Treasure, Wario finally hit the mother lode. Searching deep in the Mushroom Kingdom he found a resource untapped by its people, who cared little for the accumulation of riches. He uncovered a great mine in a chasm of the earth where he stole Gold from the earth to make into coins directly. This made him an extremely powerful figure in Mushroom Banking. The many Mushroom Folk he employed were forced to live on sight, in stuffy, smokey houses built into the cliffside. It was only a matter of time before he employed the track already in place for the Grand Prix.

Wii:

Wario's Grand Prix closes the Flower Cup and is one of the more difficult courses in the game. While many courses in the game are wide to accommodate the increased number of Drivers, the trickiest parts of this course are also the narrowest and lack guardrails. The wooden mine track-style and many hills and drops are like a roller coaster reminiscent of Wario Colosseum or even Waluigi Pinball. Also like Waluigi Stadium it is near sunset. They are all stylistically distinct enough though, to warrant separate entries.


The layout may seem simple, as it may be simplified to a common loop, but really it is a twisting, treacherous course with unforgiving turns, jumps, and obstacles like Swoops and Minecarts that can be deadly. It is more organic, with constant turns instead of straightaways to take advantage of any speed. Indeed, falling behind and getting only mushrooms or stars can be extremely hazardous. While there aren't horizontal complications, there are also many vertical complications that make it more difficult.

Each course in Wii has Normal and Expert Staff Ghosts in Time Trials. The Normal is Wario in his own Bike at 02:19.585 while the Expert upgrades to the Flame Flyer in 02:04.800. I find Bikes exceedingly unstable and difficult to control here, Karts are an easier option. Speed here is hairy, someone with more control and drift, such as Mario would work well. Grand Prix can be more perilous with Karts jostling, Bowser is able to knock others around while getting a small drift bonus himself and would be a good fit.

Metal Mario

History:

Mario discovered a ! Box in the Mushroom Kingdom that could turn his entire body into Metal years ago. He used this to become invulnerable, sinkable, and much heavier. Eventually this essence was seized by the extra-dimensional entity known as Master Hand. Master Hand created a physical representation of this essence and set it as a slave to do his bidding and in the extra-dimensional wars known as Super Smash Bros., Metal Mario was his longest and most faithful servant.

Eventually though, Metal Mario was able to break free from Master Hand's control, in part due to his continued exposure to the origin of his essence, Mario. Master Hand, furious, exiled him to the Mushroom Kingdom where he wandered for years until finally eking out a bitter existence. Metal Mario has no emotions, is invulnerable to all known physical damage. As he is finding himself though, his mental capacities are growing and inside grows a bitterness for the Mario that can feel.

7:

There are an insane amount of play options in Mario Kart 7. There are five different sets of stats based on weight to which are added sixteen different possible Kart stats, ten different wheels, and seven different gliders. This makes for a total of 5600 different combinations. Here we will present just one of those combinations - the one that would best fit a playing style that adheres to Metal Mario's most basic stats. It is possible however, to change his stats so that the character can be used to fit just about anything.

This is the only Mario Kart Game where Metal Mario appears and the only game he has shown up in as a distinct character in a decade. He is a Heavyweight, giving him the same base stats as Bowser, Wario, and the Honey Queen. He therefore possesses great Land Speed and Weight at the expense of Sea Speed, Acceleration, Handling, Off-Road, Mini-Turbo, and Weight. This would seem a large disadvantage if Land Speed and Weight weren't the only things that mattered in some Grand Prix Races. We've taken him in the Pipe Frame Kart then, which fits his metallic nature, along with Gold Accessories to complete a lovely Silver and Gold Theme to come up with a Racer who can dominate on land. His stats are thus:


This combo works when you need Land and Air Speed to be tremendous while not being pushed around at the expense of everything else. This is a pure racer that needs to only go straight, stay on the path with minimal acceleration and mini-turbo capabilities. There are plenty of courses that fit this, including any Circuit Track, Rock Rock Mountain, and Wuhu Loop. The cool, but complex thing about 7 is that Racers can be so customized that if this doesn't suit your love for Metal Mario there are plenty more adaptable ways to fill those needs.

Metal Mario appears as the Staff Ghost in two courses, as do all characters here. He first shows up in Neo Bowser City, which seems bizarre that he is snarking in on someone else's namesake, but it is a cold, unforgiving city befitting of the Metal One's nature. He uses Standard Everything and the Super Glider, essentially racing as a blank slate in 02:11.032. The Expert goes 01:58.996 using the Blue 7, Monster Wheels, and Paraglider, which should be substantially faster and plays to his strengths, and weaknesses. His second ghost is the Retro Airship Fortress, another track supposedly tied by Bowser. He uses the Zucchini, Slick Wheels, and Glider this time in 02:23.323, which is an awful Kart. The Expert transitions to the Standard, Monster Wheels, and Super Glider in 02:07.704, which is almost like the Neo Bowser City Expert but less polarized.

Friday, March 9, 2012

Coconut Mall

History:

The Coconut Mall was already a popular shopping spot on the Isle of Delfino before Daisy took it over. Located near Gelato Beach, she purchased the Mall and converted it to a race course that ended up being even more popular than it was as simply a shopping center. Nevermind the intrusion of Royal Influences on the Isle of Delfino, Daisy later gave the mall over to the Honey Queen, as with her Cruise Line booming and other courses burgeoning, the high crowds and demands became too much for her to handle.


Wii:

Coconut Mall is the second course in the Flower Cup and provides a good transition between the ease of the Mario Circuit and the growing complication of that cup. There is no major dangers here but there are plenty of multiple pathways, difficult shortcuts, sharp turns, and obstacles. There is no Off-Road here, except for a shortcut after the first set of escalators, and for the most part the track is wide but with sheer walls, allowing for plenty of chaos. There are many different paths, although for the most part one is clearly better than the other. The trickiest part may be making sure you hit an escalator when it is moving up and not down, which is on a timer that should work naturally with the progression of the course. If you get bogged down and fall behind that timing will be off (rarely, if you in fact get too far ahead you can beat the timing as well, although this is more of a Time Trial issue). The killer is also timing the final stretch of Boosts around the Cars.

The Staff Ghost here is Daisy, who uses the Sugarscoot in 02:30.764. The Expert switches to the Wild Wing in 02:13.333. Although Daisy is a good character for this level with is massive straightaways and moderate turns, Funky or Rosalina can do a little better with their Vehicle Options' Base Stats and if driven correctly there's no need to slow down or to have even moderate handling.

This track makes a comeback in 7, with some minor changes such as the lack of a final Car, making the final dash panel much safer to hit. The biggest change is the Airstrip on the Final Big Jump, although it's not as essential as Air Travel is on some of the other courses. The Ghost here is switched to the Honey Queen, who uses the Standard, Slim Tires and Super Glider in 02:30.117. The Expert switches to the Koopa Clown, Sponge, and Paraglider in 02:14.167. Her handling in the air will be superb but her land speed leaves much to be desired. Swap those wheels for Slick or Gold and burn it.

Thursday, March 8, 2012

Dry Bowser

History:

During a routine battle with Mario in his Castle, Bowser was knocked into a pit of lava. While normally his thick skin would have protected him, this time Bowser tried to absorb the very power of the pit around him in a last ditch effort to destroy Mario. This proved to be too much for even the Dark Koopa Lord to take on, and Bowser's soul actually passed on to the netherworld but his dark essence was able to survive and reanimate his skeletal structure similar to Dry Bones. Now a soulless monster, Dry Bowser, as he came to be known, terrorized the Mushroom Kingdom and became King of the Dry Bones. Bowser's soul was eventually able to return to a new fresh body provided through the efforts of Bowser, Jr. and Kamek. Now that Dry Bowser and Bowser exist independently of each other, they have entered in an uneasy truce, as Dry Bowser possesses much of memories and abilities of Bowser, tho twisted and demented because he survives only as the product of a Dark Magic Will.

Wii:

Dry Bowser may be the coolest racer in any Mario Kart game and he makes his appearance only in Wii, where he is a Large Class Driver. Each size class in Wii has access to Six Karts and Six Bikes, all of varying stats. Additionally, each character adds his or her own specific bonuses to certain stats. Dry Bowser is a tricky driver. His +6 Off-Road Bonus ties Toadette as the best in the game, although there are far less vehicles available for him to take advantage of. His +6 Mini-Turbo ties Wario, Dry Bones, and Koopa Troopa as the best in the game, which again, is tricky to take advantage of. His specific stats for each vehicle are as follows:


His best ride may be the Phantom, which does have a pretty decent Off-Road, making him able to snake through shortcuts with ease as well as making mistakes or accidents that send him into the rough a little more forgiving. If there's a course without this advantage though, such as Rainbow Road or Toad's Factory, either the Honeycoupe or Shooting Star with his superior Drift, Speed, and especially Mini-Turbo can be deadly.

Dry Bowser has two Staff Ghosts in Time Trials. His first and arguably signature course is Grumble Volcano, a course literally succumbing to the Lake of Lava it rests in mirrors his own twisted existence. He does a 02:28.237 in the Offroader, while the Expert switches to the Spear and goes 02:11.852. The Offroader, despite providing his great Off-Road advantage, is not nearly fast enough for Time Trials, and the Spear doesn't really take advantage of his strengths, although it is very fast. His other Ghost is on the Retro Bowser Castle 3, which has no Off-Road at all, so it robs him of that advantage. The Normal goes 02:58.304 in the Standard Kart L and the expert goes 02:39.391 in the Flame Runner. It's an exceedingly difficult course but Dry Bowser in the Flame Runner isn't the best option, play to whatever speed or handling strength you have and take him down.

Toad's Factory

History:

It was rare that Toad sought employment or ventures outside of his role in the Royal Court. He was, however, able to find success after years of Grand Prix, making Items for use both in races and battle. He constructed a huge factory in the Mushroom Kingdom dedicated to this production. Eventually he opened it up to racing as well.

Wii:

Toad's Factory is actually less complicated than it looks. In essence it's a simple loop, although there are plenty of difficult parts. As a closer for the Mushroom Cup it has a good balance between challenge and simplicity. The trickiest parts involve moving pathways that shift and can either greatly help or impede speed. It's essential during the final stretch to time the race correctly to boost over the oil, otherwise you're in for a very slow finish at a critical moment. Immediately prior to this is a dangerous jump that gives you a ton of speed going into a sharp turn. No straightaway is really straightfoward then, there is plenty of weaving to be done in between boxes, crushers, or giant bulldozers.

Toad's only Staff Ghost appears on this track. He goes a 02:22.480 with the Bubble Bike while the Expert goes 02:05.593 in the Blue Falcon. Considering how deceptive this course is and the need for a fast reaction time along with a small profile I would suggest a Medium-Sized Racer using either the Mach Bike or Dolphin Dasher. Daisy with both her speed and handling makes a fine choice.

Wednesday, March 7, 2012

Funky Kong

History:

Funky is well-known throughout the Mushroom World as the Funkiest Dude Alive. He grew up alongside Donkey Kong on the DK Island, and was as much a brother as a friend to the Lord of the Island. He always had a much more laid back approach to life than Donkey did, though. Despite this fact, he ran a few successful businesses. Starting as a surfer, Funky was able to actually create his own Regional Airline Service, although the speed and hazards involved in his Barrel Planes turned away about all but Donkey and Diddy Kong. He was later able to branch out into mechanical repair and even did a little gun-running. He was soon sitting on enough funds to fully support his thrill-seeking personality, having never inherited the vast Banana Fortune that Donkey did.

While he never owned a course of his own, his close relationship with Donkey Kong gave him free reign of his many courses. Funky was able to invest his personal wealth instead into a massive venue, Funky Stadium, that was used for every kind of extreme sport imaginable, although he gained the most notoriety from using it for Mario Kart Battles.

Wii:

Funky makes his only appearance in Wii, and it's a lasting impression. As a large-sized character he is able to push around many of the littler racers. For each size class in Wii the drivers can choose between six Karts and six Bikes, each of which with specific stats. In addition, each character adds his or her own bonuses. Funky adds +4 Speed and +3 Off-Road. The stats for the twelve vehicles Funky may use are as follows:


While his Off-Road stat for many of the large vehicles is useless, his speed is where it's at. He has the best speed boost of any Large Character, which boosts their already impressive speed. This means that Funky in the Jetsetter is the fastest Kart in the game and he makes the Spear the fastest Bike. The abysmal handling and acceleration of these rides makes them less valuable however. If he jumps in something like the Flame Flyer or Flame Runner he is slightly more balanced while still taking great advantage of speed - and many Time Trial World Records are set with that combo.

Funky's Off-Road is useless because he's so fast on the track that skilled drivers should never be taking him Off-Road. The only Large vehicles that could take advantage of this, the Offroader and the Wario Bike, have speed so bad that they should be useless to Funky. Wario, Waluigi, King Boo, and Dry Bowser all have Off-Road stats equal to or greater than Funky's, along with other stats that support different driving styles. Funky is all-speed, and when using him you need to get ahead early and drive well enough to stay there forever. He's nasty.

His only ghost is on the Retro DK Mountain where he uses the Wario Bike in 02:57.744. Again, this doesn't really use Funky's advantages and should be beaten easily. The Expert Ghost though, upgrades to the Flame Flyer in 02:38.130. DK Mountain has enough turns to slow him down though, pick someone with comparable speed and better handling such as Daisy in the Mach Bike or Dolphin Dasher and you'll have a good shot. While Funky doesn't have any tracks named after him, he does have the Funky Stadium Battle Stage. Funky Stadium is one of only two Battle Courses named after a character (The other being Luigi's Mansion from Double Dash), although there are others associated with specific characters, especially in Mario Kart 7.

Mountain Tracks

History:

In the vast Northwest of the Mushroom Kingdom lay the Tall Tall Mountains, a place rarely traveled by the Mushroom Folk. It is full of dangerous enemies, steep cliffs, and enormous bouncy mushrooms that grow thousands of feet tall. Naturally as the stakes of the Grand Prix increased and more racers vied for their own signature tracks, newcomers were forced to stretch out into this harsh dominion.

Toadette, the power-hungry manipulator that she is, had long hidden in these mountains. It was no surprise then that she owned vast amounts of land to construct the Mushroom Gorge track, which she ran with an evil fungi fist. Lower in the Valley, Daisy established the Daisy Hills track with her own Mitt Romney-like personal wealth. Finally, higher in the mountains Wiggler, piecing together a rudimentary system of nerve impulses he used for a mind, converted his personal home into the Rock Rock Mountain. Along the same chain lay the Shy Guy Metal Mines, which these mysterious people had turned into a profitable business. With anti-gravity technology developed in 2014, the Shy Guys were able to convert this mine into another course, traveling up a previously inaccessible water fall

Wii:

Mushroom Gorge is a fairly simple loop. There are plenty of turns though none of them are that sharp. The greatest hazard here is the boost ramps and Bouncy Mushrooms, which without proper timing can disrupt even experienced drivers. The road also forks into two different paths on two different occasions, although in both cases sticking to the right is a faster option.

The staff ghost is Toadette with a time of 02:16.110 in the Quacker, while her expert goes 02:01.011 in the Mini-Beast. Neither of these vehicles takes advantage of Toadette's greatest strength, her offroad ability, so using just about anyone with good speed and moderate handling like Daisy or Rosalina can beat the pink toadie without a huge issue.

This track returns in 7, where the Ghost this time is Toad. The normal goes a 02:02.292 using the Cloud 9, Mushroom Wheels, and Parafoil, meaning that he'll have a decent mini-turbo and handling, although most of his other stats end up pretty average, especially his speed and acceleration, which is where you can beat him easily on this simple track. The Expert, though, pulls a 01:50.526 using the Pipe Frame, Monster Wheels, and Super Glider. This means Toad will have great offroad (useless here) and above average speed, but terrible handling. Counter that with some Roller or Wood wheels on something fast and you should succeed.

7:

There are two courses in 7 that seem to carry on this Mountain Theme that many Mario Kart Tracks have exhibited, mostly in DK Tracks. Daisy Hills is very reminiscent of Mushroom Gorge, from its steep inclines, wooden dock paths and large gaps.It's also in the Mushroom Cup again and provides the game's first big jump and introduction to the aerial driving that helps to define this game. Other than that, the course is wide, probably with more curves and boosts than a typical Mushroom Cup Track, but nothing intensely difficult.

The Staff Ghost here is Daisy on her eponymous course. She goes a 02:06.351 using the Royal Ribbon, Roller Wheels, and Peach Parasol, which gives her substantial boosts in just about everything except for both land and air speed. Those two crucial components are what can be used to beat her, because there isn't a great need for anything else on this course. The expert uses the same ride with the Sponge Wheels and Super Glider, which means she no longer has a disadvantage in the air and her mini-turbo becomes very good. Sticking with a strong land speed and moderate handling should be fine.

There is also Rock Rock Mountain in 7, which seems to lift directly some parts from Super Mario 64's Tall Tall Mountain. It is actually a relatively simple track with many straightaways, although some tough curves near the start. Rock Rock Mountain is actually the longest original track in the game, which is surprising for a track that closes the Flower Cup. It's also one of the most reliant on air speed. There are multiple big jumps, one of which is deadly - it is greatly beneficial if you survive, but getting hit will lead you to tumble to the path below while others whiz by. There is also a tough vertical track with boosts and rocks that is difficult to avoid, but mostly a straightaway.

The staff ghost is Wiggler at a 02:35.105 using the Standard with Red Monster Wheels and the Super Glider. It's a tough match but the speed can be beat easily by using something like the B Dasher or Bumble V with Wood Wheels and the same Glider. The expert isn't all that better, but he goes a 02:19.149 using the same combination but with the Flower Glider, which increases his air handling at the expense of speed. Stick with a Glider that doesn't slow down that big jump and you'll be fine.

8:

Shy Guy Falls closes out the Flower Cup and contains one of the more relentless vertical sections in the game. There are many tight turns where errors can lead to perilous cliff edges and of course, the eponymous water fall. Going up the falls is difficult if you miss the boost pads, but going down offers a speed increase like the river in Koopa Cape. After that there is an average-sized air section.

The Staff Ghost here is Shy Guy, of course, who goes 2:19.528 using the Flame Rider, Retro Off-Road Wheels, and the Super Glider. The Flame Rider is an excellent choice, but something with more anti-gravity handling such as the Sport Bike may be a good option. Shy Guy may be here because of his strong previous association with desert tracks, and Shy Guy Falls, despite its huge waterfall, seems like it's in some craggy desert canyon.